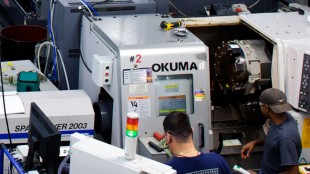

As a company that specializes in Lean training videos, using video for process improvement seemed like a natural fit. In addition to being teachers and continuing students of Lean methods, our team consists of videographers, photographers, and graphic designers. One of us even plays jazz flute! We realized that making instructional videos focused on Lean is not the only way to combine these skills. Another way is to apply the tools of the videographer’s trade to the Kaizen process. In our last blog post, we discussed the history and potential of using video for process improvement. In this entry, we will focus on equipment. The methods and equipment to use will vary depending on your subject of study as well as social conditions with the people participating in the study.
Choosing Video Equipment
In the past, equipment was one of the main barriers to using film and later video for process improvement activities. For much of the twentieth century, cameras were expensive, heavy, and difficult to operate. With advances in digital technology, anyone can now shoot video in high definition at the touch of a button, but this doesn’t mean that there is no skill required, or that all equipment is created equal. Quickly browsing YouTube will reveal huge gaps in quality between professional productions and a video your neighbor shot vertically on his iPhone. That’s not to say you can’t use a phone’s built in features and achieve great results, but you need to choose your equipment based on your improvement initiative. Although people’s phones are readily available, there are other options for cameras, not to mention other equipment. Here are a few to consider, along with their pros and cons:

An “Action Camera”
Cameras
Camera phones
Pros: Simple to operate, readily available.
Cons: Inconsistent video quality, uncomfortable to operate for long periods
Uses: Great for spur of the moment analysis. They are also great for getting large numbers of people involved to generate multiple angles and points of view. Just make sure everyone stays off of Facebook while they’re working.
Consumer camcorders
Pro: Consistent quality, easy to handle.
Cons: Prices vary, bulkier than other options, can be fragile
Uses: This is the most versatile option. Excellent for use in scheduled kaizen workshops
DSLR cameras
Pros: Great image quality, many lens options, time-lapse features
Cons: Relatively expensive, steep learning curve, time limits for video clips
Use: The clip limit restricts their video function to shorter processes. On the other hand, time-lapse photography is an option for very long processes (over a few hours).
Action cameras (i.e. GoPro)
Pros: Small, light and durable, wearable, many accessories
Con: Fewer shooting options, can be expensive.
Uses: The most personal perspective. This is great way to get a first-person view without distracting the workers or inhibiting their movement.
Accessories
Tripods
Pros: A fixed and stable shot, the camera can be left on for long periods unattended
Cons: Takes up space, limited mobility
Selfie sticks
Pros: Allows videographer to join the shot, easily shoot high and low angles
Cons: Tiring when used for long periods, distracting
Wearable mounts
Pro: Greatest mobility, frees up both arms, easy POV recordings
Cons: Limited perspective of work area, might seem intrusive

Professional video lights (left) and simple work lights (right)
Lighting and Audio
Lighting and sound are major aspects of professional video production, but for process analysis and improvement there are just a few major factors to consider.
Adequate Visibility
Today’s digital cameras can offer amazing image resolution in a small package, but their small lenses and sensors make it difficult to capture clear images in low light. Unless your process requires a dimly lit environment (in that case you’ll want to make sure your camera has low light or night vision modes), a well-lit work area should be the standard to begin with. Good lighting is a requirement for safety and a visual work environment. If you need to invest in lighting equipment to get a clear shot, you might just consider inverting in better facility lighting in general. Work lights are cheaper than video lighting equipment. In fact, many videographers on a tight budget make their own lighting gear by modifying work lights.
The Value of Sound
The first question to ask regarding audio equipment is “how much do I need to hear?” This will vary greatly depending on the process. In most manufacturing settings, the machines and processes generate a lot of noise. If you need to monitor the sound of a particular machine, or document people’s conversations, you may need specialized equipment such as directional microphones, lapel microphones, and portable audio recorders. For most other purposes, the built-in mic of your video camera should be good enough, especially if sound is not relevant to the processes being examined
This should give you a good idea of what you will or will not need in order to capture your processes on video. Let us know if you have any more insights on video equipment based on your own experience. In our next article, we will discuss the process of capturing video for process improvement using a variety of techniques.


1 Responses on Using Video for Process Improvement – Part 2: Preparation and Equipment"